
My Memory Box of Life
with Harry Brabec
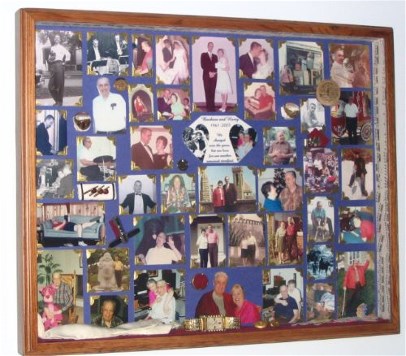
If you’d like to make a special memory box of a loved one, knowing how I created this one might be helpful to you. This is a photographic look at my life with Harry Brabec over nearly 44 years of marriage.
by Barbara Brabec
AN IMPORTANT PART of my widowhood journey in 2005 was giving myself time to grieve and remember and reflect on my entire life with Harry with all its ups and downs, highs and lows, and one adventure after another. Because I’d made memory boxes of other family members I’d lost, making a special one about our life together topped my list of things to do after a six-week visit to California to be with my sisters right after his death.
The details of this picture are hard to see, but you get the idea. You can combine not only photographs but small objects and a variety of other materials to make a box that will be as unique as your loved one.
Remembering my life with an unusual man and musician.
I began my search for a box at Hobby Lobby, which had a glass-covered shadow box* that was exactly what I wanted. But it had a masonite backing board that soon presented me with a problem: how to affix photographs and objects to this surface?
*When I later needed a cover for another memory box, I bought a sheet of Plexiglas cut to size, and then drilled tiny holes in it so it could be screwed into the frame of the finished box with tiny gold screws.
First I had to decide how to cover the masonite backing board with something, and it needed to be blue to match my bedroom walls where I planned to hang the picture. But blue denim wouldn’t work because I couldn’t affix photos to it. After thinking about it for a week, I decided to glue blue construction paper to the masonite, which would accept the gold photo corners (hard to find now, but they are available on the web). (I couldn’t use a decoupage method because this would have reacted with some of the inkjet-printed pictures I was using.)
Before adding photos, I lined the sides and top of the box with some of Harry’s drum music and laid a strip of red velvety fabric on the bottom, where I planned to place some objects.
After spending several days selecting photos from my lifetime collection, then scanning and resizing several to fit available space, I planned the layout and gradually began to affix them to the backing, leaving spaces for the 3-D objects I planned to include. A friend cautioned that my inkjet-printed photos would fade over time, but I figured if that happened, I could simply remove the picture board from the frame, print new photos, insert them into the glued-down photo corners, and it would be as good as new. (There has been no fading after nearly sixteen years of being hung in an area that gets no direct sun, so this is no longer the concern it once was.)
Affixing 3-D Objects to the Board
THE 3-D OBJECTS in the box include Harry’s rings and pins, the buttons he used to use on his white vest, a drum key, a pair of cufflinks, his favorite “ruby” watch, his wedding ring, a tie clip I had specially made for him, a wooden souvenir button from Silver Dollar City, the crocheted cross his mother made for him as a boy, and one of his white ties. (The white vest he wore when he was with the Chicago Symphony is neatly folded in a plastic folder on the back of the box.)
Affixing objects presented me with another problem because I couldn’t glue them directly to the construction paper. So I used pieces of Styrofoam to hold bulky rings and vest buttons and pieces of the red velvety fabric to serve as a background for tie clips, buttons, and other objects. Some were glued to the fabric; others had to be attached with invisible thread. Objects positioned on the bottom strip of fabric were affixed in such a way to prevent them from sliding when the box was moved.
A GLUE TIP: I don’t recall the brand of glue I used, but it was designed for this kind of use. Nothing in any of my memory boxes has ever come unglued, so make sure you use the right kind of crafting glue for long-lasting results.
A project like this will take many hours of planning and actual work, but I can assure you that it will give years of pleasure to its creator.
Related Articles:
Picture Yourself in a Typesetter’s Tray. How to transform an antique typesetter’s tray into a unique memory box of your life or someone you love.
How to Make a Father’s Memory Box. Originally published in Crafts ‘n Things magazine as a how-to project, it will spark ideas for how to combine photos with personal objects.
About Harry Brabec—A Look at the man and his music, as documented in Barbara’s memoir, The Drummer Drives! Everybody else Rides.